Mail Call.

Hello Beauty Marked! Just a quick one to say that I am loving your beauty blog extraordinaire. I was wondering why exfoliation is the key to avoiding ingrown hairs? And does it matter how you exfoliate when it comes to preventing ingrowns?
As happily answered…
Thank you for your great question and kind words. I appreciate them both immensely.
The reason why exfoliating areas that are prone to ingrown hairs that arise from waxing and tweezing generally and very occasionally from shaving is a good idea is because when a new hair grows post a hair removal treatment that relies on damaging the hair follicle as it modus operandi, it usually is a shadow of it’s former self physically. Some hairs no longer possess the same structural fortitude needed to gracefully push through the skin’s surface and can either get trapped below the surface or curl back onto itself which results in an ingrown hair. Ouchy! So if we help the hair along a bit by gently exfoliating the skin and removing the skin build up, the hair’s chances of pushing through the surface unimpeded are greatly improved.
As for which method of exfoliation works best, it really is a matter of personal preference. Gentle chemical exfoliation by AHAs works as does manual exfoliation with a loofah or gentle granular scrubs. The key to successful exfoliation is that you start doing it from your next tub after the initial hair removal and continue daily for at least 7 to 10 days, depending on how speedy your hair re-grows. Most hair has managed to make it past the risk of ingrown stage after this time. It ought to be pretty smooth sailing after this time period, well, that is until it’s time to jump on that hair removal merry-go-round once again. Oh the joys!
Look At This Little Cutie.
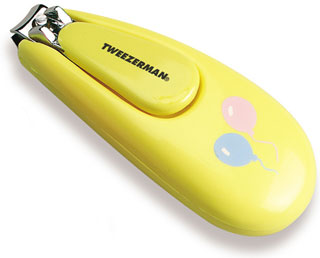
Oh my goodness! How darling is this baby nail clipper? This little “cutie pie” is courtesy of Tweezerman and not only does it look adorable, but it works a treat! Tweezerman’s large handled, ergonomic Baby Nail Clipper is a fantastic beauty tool for keeping the Wee One a picture of their gorgeously groomed, perfected selves. Don’t be fooled by this clipper’s jejune appearance as it is well and truly in the big leagues when it comes to performance. This baby nail clipper is a chip off the old block. It does Tweezerman proud, maintains the family standards and established reputation. *whispers* The Tweezerman Nail Clipper even works well on “big people’s” fingers too should you be unable to resist the temptation to use this “cute as a button” clipper. Who could blame you? Love ‘em!
Visit Dateline Imports for Tweezerman Baby Nail Clippers and so much more.
On Target With Your Saturday Night Special.
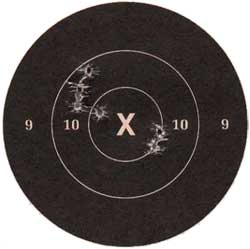
I’m thinking eyes that are packing pure, smoked-out, shimmery gorgeousness for the evening’s festivities. What do you think? Maybe a goer for tonight’s makeup look? Here’s a few product suggestions to get you going:
M.A.C. Paint Pot in Blackground to eyelid as a base, M.A.C. Blue Brown Pigment to set and blended fabulously up to the crease. M.A.C. Club pressed eye shadow to crease and outer V. M.A.C. Vex pressed eyeshadow lightly applied as brow highlight and blended impeccably. Black gel or kohl eyeliner to water and tightlines for both upper and lower lash lines. Finish off with the requisite lashings of black mascara on celestially curled lashes.
The what’s next…
Groomed brows, cheeks that are very much a supporting act for those killer eyes and a low maintenance lip that is lightly stained and slicked with a YLBB (your lips but better) nude. C’est tout. Just prepare to slay ‘em!
Now I Can Quit Bellyaching…
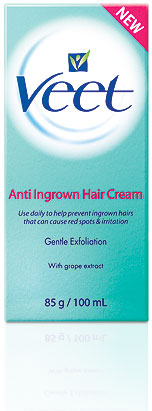
Ingrowns. IngrownsIngrownsIngrownsIngrownsIngrownsIngrownsIngrowns! Grrrrrrr. The bane of my existence. There, I’ve said it! Well thanks to Veet, I can now get “that” out of my system. Pesky little so and so’s that they are. Veet Anti- Ingrown Hair Cream has been designed specifically for use on the bikini line, underarms, and legs. This beauty can be used immediately after shaving or waxing and then daily for a gentle exfoliation that will leave you largely ingrown hair-free. Yesss! Veet Anti Ingrown Hair Cream contains mildly exfoliating alpha hydroxy acid (AHA) which helps to prevent ingrowns and lessens redness that can result and also contains grape extract that nourishes your skin leaving it smooth and soft, just like we like.
So bellyache no more Gorgeous Ones as Veet Anti Ingrown Hair Cream is available now in a supermarket or pharmacy near you. Whoohoooo!
The Progressive Pedicure.
The other day a new client of mine said to me that she dreads the strappy summer sandal season because she never has time for a pedicure and is always embarrassed about the state of her feet. Just for a moment, a rather surreal moment, after hearing this, I had a very dark and chilling thought about life without the possibility of pedicure, I shivered for a second and then popped back to the magic of present moment of all things mani and pedicured. Needless to say, I felt for her. No time for a pedicure? No time to feel fabulous and confident in gorgeous summer shoes? *shivers again and races back to my happy place*
Then I asked this lovely lass if she’d ever thought of a progressive pedicure? A progressive pedi might indeed be the salvation for her sole. *idea* All you need to do for a progressive pedi is to scrub your feet, especially the heels and balls of your feet and around the skin along the sides and bottom of your big toes with a pumice stone when showering daily, which takes like…a minute. Then when your drying your feet, make sure to firmly rub to dry all over your feet as this does wonders to further slough off dead skin. Then moisturize your feet, as post showering is ideal. At some stage, take the opportunity to clip your toe nails and file them short and squarish. That can be all that’s done at this time.
On the next opportunity you have a hot minute post your daily pumice, firm dry, and moisturizing session, push your cuticles back carefully and paint your toes with a base coat. If you prefer toes sans polish, just gently push your cuticles back, buff your clean, clipped, and square-filled nails and leave it at that. If you do decide to polish your nails, just do a coat at a time. You can do a lightening-fast coat a day or a coat between chores etc.. It’s lucky for us, that toe nails that are cut short and squared will actually hold a neater polish longer. When you have finally managed to polish your toes completely and follow up with a top coat, they will stay looking dazzling for sometime. Especially, if we continue to moisturize after showering. You can also do a quick slick of top coat every few days to ensure that your nail polish remain in good nick. So there you have it. Great looking feet that are in fantastic form before you know it! Do enjoy!
Just A Quick Question…
Hi BM!,
I just have a quick one about how often I should wash my makeup brushes. Is it really necessary to wash them after every use? I use them daily too. How dirty can they be for goodness sake?
My best efforts at a quick reply:
I don’t imagine your makeup brushes would be too dirty unless you follow up your makeup application with a light house dusting as well. Weekly should be fine for makeup brushes that have been used on dry/powder products. Clean after each use is generally the recommendation for brushes that have been used on moist or cream based products. But if you’re like me and a bit time poor, have a few makeup brushes on hand for moist product application and rotate them through the week’s use or apply makeup with clean fingers when and where possible. That way your makeup brushes can have one big lovingly attentive wash together at the end of the week as they do adore one another’s company to dry and I’m sure you’ll appreciate the free time that arises from doing them all in the one go. Thanks for your great question. Fingers crossed that helps.
-BM! x
Castor Oil Does More Than Get You Going.
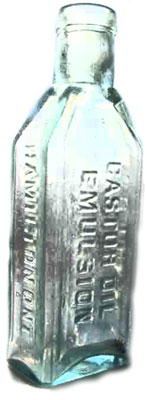
Seriously, did you know that castor oil is the main ingredient in most nonprescription brow growth products? Cheap as chips too. All you need to do is get a hold of some castor oil and a cotton bud. Funnily enough, getting a hold of some castor oil might prove to be the trickiest part of the operation. I nabbed a bottle from my local supermarket in the aisle that houses the things that get you going the good old fashioned way. *blush* But when you do find some castor oil… dip the cotton bud lightly into the cap of the castor oil. Next, gently run the bud over the back of your hand to rub off excess castor oil. After you’re satisfied that you only have the tiniest amount of the castor oil on your cotton bud, gently wipe the bud across your eyebrows and onto the section where you’d like to have more brows. Mind you, the operative word here is “tiniest”, otherwise you will have an ecological disaster on your hands. This oil slick will only add insult to injury by potentially causing breakouts, further highlighting any brow issues! Apply the castor oil treatment as often as you can, especially at the end of the day after cleansing and moisturizing for the night. In fact, this time is ideal. Thanks to this nifty trick, Robert’s your mother’s brother and you’ll have fabbo brows in no time. Sweet!