Oh, Is That The Time?

Where does the time go? Is it nearly the 31st of August at 5pm EST, already? I hardly noticed. Okay, okay, maybe my nose did grow a wee bit when I wrote that, but I am still so very excited about Beauty Marked!’s nomination for the 2007 Australian Star Beauty Blog Award that I couldn’t help myself. I just don’t want the voting to close before you have a hot minute to pop by and Vote *cough* For Yours Truly *cough* if you feel so inspired. Gosh, the time sure does fly by when your having fun! * still happy dancing*
Betty Who?
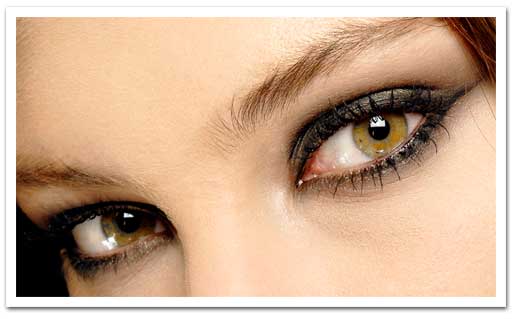
There’s nothing Betty Davis eyes about those arresting peepers. These super polished and super beautiful eyes are courtesy of the ever-so-talented and ultra charming Tom Pecheaux for Emmanuel Ungaro AW08. When asked…the dashing Tom Pecheaux wanted us to know all about those uber alluring and exceedingly sultry eyes created from sheer M.A.C. genius:
Cue eyes built up in winged, multi-dimensional shadow, a seamless mix of eyeshadow in Showstopper and Carbon (to make ebony brown) pulled out from the socket. Fluidline in Blacktrack wrapped along the upper and outer half of the bottom lashlines and a feathering of eyeshadow in Fiction (a chromatic olive) on the lid. The brows were tinted deeper with a speedy brush through with mascara in Charcoal Brown followed by a brow brush to pull extra attention to the siren-like gaze.
Beauty Marked! absolutely has to agree, this look is just pure unadulterated smolder. I’ll have a pair of those, thanks!
Order up this look and much more M.A.C. gorgeousness online or at your nearest M.A.C. counter. Mmmm…
It’s A Bit Warpo, Really…
Nail polish, that is. Ever polished your nails in the evening, just before bed, in anticipation for the following days adventures? Filed and shaped your nails like the gorgeous beauty that you are, gone the obligatory base coat, 2 coats of colour, a top coat, assumed the requisite nail drying position and before time fallen asleep! Drats! Me too! Sometimes you can be lucky and zonk out with your nails free from anything that will emboss your polish, other times… not so lucky. You awaken from your much needed beauty sleep only to find your polish has gone warpo and is now not so gorgeously shiny, but kind of matte and unintentionally texturized. Grrrr. Now what? Fingers crossed, you can just barely wet a cotton bud with nail polish remover and quickly and lightly swipe the unflatteringly embossed area in one direction from your nail bed towards your finger tips (the direction in which you applied the polish) to sort it out. This may just smooth the offending area enough that a top coat is all that’s needed to bring back a smooth glistening shine. Alternately, you may have to go with one uber light coat of coloured polish first then follow up with topcoat. Most times, this will get you out of shtook. An additional slick of top coat alone works a treat for restoring matte nails to their intended stellar finish a great majority of the time. If neither of these tips are working, you might just have to take off the polish and start again. Sighs. But do weigh up the time and frustration factor before you head down that road. Are your nails really that jacked up? Can’t you get away with a little tart up and just keep your hands moving so no one can get a clear fix on your random design? Are you positive you can’t just rock your mani like you meant it? After all, apparently the word on the street is that the deconstructed manicure is all the rage in the Paris shows. -And that’s my story and I’m sticking to it!
Wouldn’t You Know It.
It’s always the way isn’t it? My face, a shoe in for first runner up in the 2007 Elephant Eyes of the Year Contest and I had a meeting to attend! Don’t you hate that? No, I most certainly did not go out warts (or crepes) and all, but did my best camouflage makeup and prayed that I wouldn’t be adding insult to injury. So What did I do? I washed my face with lukewarm water only and gently pat dry with a clean towel. Then while my face was still a tad damp, I carefully pressed on a small amount of certified organic jojoba oil all over my face, including my crepey eyes. After a minute or two, I gently patted my face again with the same towel that was still slightly damp from drying my face just prior to remove any excess jojoba oil. The jojoba oil not only acted as the perfect moisturizer, as it is very sebum-like, but it also ever so slightly re-hydrated the deeper crevices that were in fact, the most sore. I then applied several light kabuki brush loads of pressed mineral base all over my face. The more matte the mineral makeup the better, as there is no need to bring extra attention by highlighting and shimmerizing the flair-up is there? After ensuring the minerals were blended in properly and not sitting up on top of the more scaly looking bits that were courteously provided by the allergy, I applied one swipe only of mineral eyeshadow to my top lids and gently blended well. I curled my lashes and applied a coat of mascara only to the top lashes. Next, I groomed and slightly filled in my brows. To finish off my look I went a few sheer slicks of mineral gloss and left it at that. Thankfully, my elephant eyes scrubbed up nicely. Phew!
According to Ms. Necessity…
What can you do if your mascara is on its last legs and you can’t lay it to rest just yet, because you haven’t any mascaraed “ladies in waiting” in store? According to the Divine Ms. N., there is something you can do that just might get you through. Simply immerse the tightly closed tube of mascara into a glass or mug of hot water and let it sit for a couple of minutes. This quick hot soak will soften the waxes and oils in the mascara loosening it up perfectly for a coat or two of what might be your mascara’s last swan song. You never know…with a bit of luck, you might even get a few bonus rounds out of your mascara with this handy little trick. *idea*
Good One, Ms. Necessity!
Sponge, Fingers, Brush?
Q. As a makeup artist, could you please tell me which you would recommend: the use of fingers, brushes, or sponges for the best foundation application for me? I am pretty new to the world of makeup.
A. To be completely honest with you, Beauty Marked!® believes that the best way to apply foundation, is largely based on which one of these application methods you feel most comfortable with and the most confident in using. There’s not much more to it than that. There are definitely merits to using sponges, fingers and brushes. *whispers* -Sometimes all in the same session.
Some folks don’t feel very confident using brushes and this lack of confidence can interfere with one’s makeup application. Getting the knack of using a synthetic foundation brush can be tricky, but worth it as it certainly gives a seamless look to liquid foundations when applied correctly. Foundation brushes are at their best when made of synthetic material so that they do not absorb the foundation and as a result you will use up far less base. Bonus.
Sponges are notorious for sucking up foundation. But their greediness aside, foundation spreads rather evenly and without streakiness when sponges are used. Sponges also seem to handle the many different foundation consistencies too, without too much drama. You can even stipple your foundation on with sponges, which will allow you to vary the depth of coverage in desired areas.
Fingers…well, these are ‘the’ original applicators, aren’t they? There’s absolutely is no shame in applying your foundation with your fingers. Fingers allow you a gorgeous intimacy with your face that is wonderful. The warmth from your fingers will also help the foundation to warm up, spread on, and blend onto your face in a fashion that is highly controllable and gives you a lovely and subtle veil of coverage. The choice is yours.
As a makeup artist, Beauty Marked!® has been known to use all three during a professional makeup application or use just one or two of the ways of applying foundation in a single session! Oy vey! Try them all and see how you feel. Go with the method or methods that you feel most comfortable with and that gives you the finished look you are after. Most importantly, have fun while you’re doing it, because that’s what it’s all about. Shoot Beauty Marked!® an email or post a comment if you’d like to know anything further. Plus, we love to hearing from you!
Benefit Doesn’t Mess About.
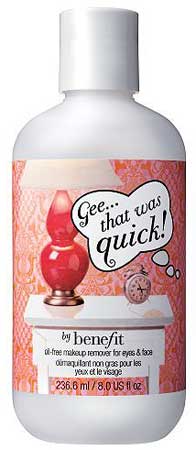
Benefit Cosmetics doesn’t jive around when it comes to their nifty oil-free makeup remover for eyes and face. Benefit’s Gee…that was quick! démaquillant non gras makes light work of removing the day’s eye and face makeup in an instant without leaving a messy oily residue. A few drops on a cotton pad and it’s well and truly a case of “Now you see it! Poof! Now you don’t!” It’s like magic. Benefit’s Gee…that was quick! is that beautiful assistant you’ve always wanted.
