ModelCo Palm Springs Glamour Look.

Here’s the Face Chart for the Palm Springs Glamour Look as promised. It’s always a pleasure to dish the slap when and where possible! Everything else from ModelCo, as designed by Noni Smith for Stephanie Conely at RAFW 07 as listed below. Enjoy!
Body:
Skin Drink- Airbrush Moisturizer
Cool Feet- Airbrush Catwalk Heels
TAN:
Tan Self Tanning Glove- On October 7th combined with
Airbrush In A Can
Body Meringue- A gradually building tan that comes in a mousse that offers a instant bronze glow with anti-cellulite benefits. On counter September 23rd.
Face:
Skinperfect Pore Minimizer- On counter July 15th.
Face Base- Skin primer
Fluidsplash 3 in 1 Foundation
Luminosity Shimmer Whip- Added to foundation in either pink or champagne for a subtle all over glow.
Bronze Airbrush Face- On counter September 2nd.
Beauty Fix Airbrush Face- Mist to set and seal makeup. On counter September 2nd.
Cheeks:
Colourbox Blush in Déjà Vu
Lips:
Illusion Lip Enhancer
Lip Lights in Coral
Tools:
Brush 01 Fine Line
Brush 02 Medium Tapered
Brush 03 Large Eyeshadow
Brush 04 Foam Applicator
Monday Makeup Madness!

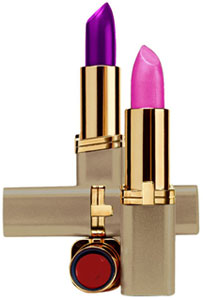
Frenzied? Freaking out? Feeling over it already and it’s only Monday? I hear ya sister! Don’t fall prey to a Mojoless Makeup Monday. What you need is a bold lip. Be it a ridiculously ravishing red, a beautifully brazen bronze, an outrageous orange, a punchy plum, a bumptious brick, or particularly precocious petal pink. It matters not which lipstick you choose, but that you choose one that pushes your boundaries.
To combat Monday and all its madness, first choose your statement lip and build the rest of your face around it. More than likely, all you will need to go with your lip du jour is lashings of mascara on curled lashes, brows, an innocent cheek, and away you go! Trust me, whatever Monday throws at you, when rocking a bold lip, you’ll be ready. Enjoy!
The Waterline.
Following on from yesterday’s Get Even More Gorgeous With Beauty Marked! post about tightlining, I thought I’d mention another super sultry eyeliner technique of lining the waterline. The area of the eye called the waterline is also known in some makeup circles as the inner membrane. The waterline is the small 2 to 2.5 mm strip of skin that extends from where the eyelashes sprout forward from the eyelid towards the eye itself. This area of skin holds the same colour pigmentation as your face. There is a definite line at the inner most edge of this area which lies directly against the eye and is part of the lubricated area of your lid, which is not considered a line-able area and should not be lined. There is a waterline on both the top and the bottom eyelids, although, the bottom lid is the easiest to see and to access. Enough of the anatomy lesson, hey.
To be honest, when the waterline is not lined, your well applied makeup will still be gorgeous, but waterlined eyes seems to give an amazing airbrushed look to your overall eye makeup, which is just magic. You can line the waterline with your stock standard eyeliner colours, but do know that the waterline can take a pop of colour and rock it like the best of them. Feel free to line the waterline with super soft eyeliners that are completely glitter free and, equally importantly, eye safe. It’s generally the done thing to avoid lining the waterline with shimmery, glittery, and polymer based liners or shadows as they are not eye safe. Another thing to keep in mind is that if you are using an eye safe pigment or powdered shadow to line the waterline, alcohol based mixing mediums and eyeliner sealant should be avoided. Visine is the only other prepared medium that can be used to mix with the powdered product to line the waterline. Failing that, plain, clean water will do. It will do quite nicely in fact.
I generally apply the eyeliner with a short handled, small filbert or paddle shaped brush, if not using a pencil, but experiment with what feels best for you. To line the bottom lids at the waterline, gently pull down on the under eye area with your pinky finger, just enough to pull the lid away from your eye a few millimeters to apply. Then gently pat the liner and or lightly sweep the liner across the waterline from the outer eye area towards the inner area of the eye where the lids meet. The same technique is done to line the top waterline, obviously pulling the lid gently upwards towards your brow though. Do be warned, that lining the waterline can feel a bit freaky. It’s sort of tickly and slightly sensitive at the same time. Most folks get used to it eventually. My favourite tip is to continue to hold your lid away from your eye for several seconds after waterlining. This allows the eyeliner to set and any tearing of your eye to settle. This gives your liner half a chance by cutting down the odds, somewhat, of your liner instantly washing away.
Do give lining the waterline a try. Lining the waterline is yet another makeup technique that can nicely finish off your eye of the day. After all, who could pass up an opportunity to get even more gorgeous?
Tightlining.
It sounds painful, right? Don’t worry, it’s not. Tightlining is a style of lining your eyes with eyeliner that gives the eyes mega definition as well as the appearance of thicker eyelashes. Essentially, what you do when you tightline is apply eyeliner precisely along the eyelash line: between and directly on top of your eyelashes. When tightlining, no liner is deposited above or below the eyelashes. Tightlining is easily done with super soft eyeliners, be they kohl, kajal, gel or powder. Eyes that are only tightlined don’t look as though they have visible eyeliner applied. Tightlined eyes don’t have that distinctive line just above or below the lashes, but look more as if you have just had your lashes tinted. Tightlining is a fabulous makeup effect that is worth keeping up your sleeve for those occasions when you’re after a less obvious, but mega effective way to thicken the appearance of your eyelashes. Tightlining + volumizing mascara on curled lashes = va Va VA Voom! Bombshell Beauty! Our favourite!
Handbag Survival Kit for Foundation Shopping.
1. a compact mirror.
2. facial towelettes (wipes that are able to gently remove makeup if need be).
3. A sample pot or sachet of facial moisturizer.
4. A good friend that will tell it like it is.
With these four items, you will, no doubt, quadruple your chances of buying the right foundation for yourself. So what are these necessities for? A mirror is absolutely essential for seeing your face and sample patches of foundation in natural light. The lights in the department stores are hideous and more often then not, misleading. Now that you have the foundation swatches on your face, it’s obligatory that you excuse yourself from the counter for a moment for a “think” about your potential purchase, but really you’re off to have a good look at the foundations being tested in natural light. If the foundation colour match is a goer, this will be instantly evident in natural light. Beauty Marked! always favours trying out at least two potential suitors to compare. Make sure not to blend the foundation in too well either. Go for the foundation that seems, most if not totally, invisible on your jaw-line. If it looks fab unblended, it’s sure to look amazing when blended in properly.
Facial towelettes are fantastic for a quick cleanse and to remove any makeup that’s on the area of your face (the jaw-line is my pick) you will be testing the foundation on. It’s amazing how so many sales assistants don’t actually remove any makeup that may be on the skin first, before applying more. Maybe it’s just that your foundation is a lot better of a match than you originally thought. Wink. When you have removed any trace of pre-existing foundation or newly tested foundation, always moisturize the area without makeup, hence the need for a small amount of moisturizer. The additional application of a small amount of moisturizer helps to protect and prep the skin for more foundation, either the one you are about to sample or from the one you just removed. Foundation always sits better on moisturized skin. I also recommend that the moisturizer be one that you routinely use. It’s always a good idea to reduce the risk of your skin completely mutinying with all the foreign activity going on at the time of foundation testing.
I wouldn’t expect that the good friend I suggested you bring foundation shopping with you will need much further explanation. We can always benefit from having someone in our corner that is willing to tell you if the foundation being sampled is indeed a perfect match for you or not. Two “foundation friendly” pairs of eyes are always better than one. Don’t worry too much either if you find yourself needing to be a bit bolshy when it comes to foundation shopping. It’s far better to test as many foundations as you need to or make as many sorties to various cosmetic counters as necessary in order to secure the foundation best suited to you. Take your time. No need to settle for anything less than your perfect match. It’s out there and will be so worth it in the end. Promise.
What In The Heck?
I am sure I didn’t reach for that colour blush this morning? I mean, why would I wear pinky red blush with peach coloured lipstick? Have I lost the plot, again? I’m sure it’s pink that I am wearing now. *cue the Twilight Zone music* I wasn’t drinking at 6:30 this morning when I applied my makeup or even on a bender the night before. What in the ham fat is going on here? Who would wear that blush with this lipstick… on purpose?!
*fade freaky music*
What has happened, quite possibly, is that you’ve fallen pray to the call of nature and your naturally flushed cheeks have transcended your makeup and reclaimed your look. This happens to so many of us. So despite your best efforts, your rosey cheeks stand their ground and demand to be noticed. Fair enough. But what if you don’t want them to remain the dominant force? You actually want to wear a gorgeous peachy orange lip and coordinate your overall look to perfection with a suitable cheek. Think of your naturally flushed cheeks as a blessing. A blessing that can be made more or less prominent to suit the look your after. To make your flushed cheeks less noticeable, pair them with a yellow based blush (peach, orange, bronze, coppers and golds). The yellow tones in the blush will hopefully counteract the excessive redness naturally occurring on you cheeks. If that’s not quite able to harness your natural flush, try a tiny smidgen of yellow based concealer on your cheeks first, lightly powder to set and then apply your chosen blush colour. If that’s not enough, add yet one more step to the equation and use a creme blush that is set with a powdered blush. Not only will your chosen cheek colour last longer, but will add just another layer of colour correcting magic for your natural flush to push through. This additional step usually shows your flush who’s boss. After all, there aren’t too many flushed cheeks that can overcome that multilayered approach. See how how go. Good Luck!
Just one of those days…

Does it look like this is going to be one of those days where one wakes up completely blank of makeup ideas that are sure to be a fresh departure from the norm? Yep, one of those days where one is sat in front of the vanity looking at one of the most beautiful canvases in the world and absolutely nothing inspirational comes back. What on earth am I going to do with this face today, did you say? We all know how easy it is just to curl those lashes, do a few quick coats of mascara, a swipe of blush on the apples, and a couple of slicks of gloss and away we go. Too easy? Yes, too temptingly easy and possibly a bit of a sign that you’re heading down the road to “Rutsville”. You know the place.
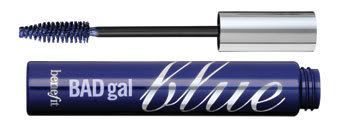
What about coloured mascara? No, I’m not talking poison apple green or fuchsia, but an alluring eggplant, burgundy, deep violet, or navy, perhaps? Richly pigmented, quality coloured mascaras can add that subtle point of difference to your makeup look that gives extraordinary appeal and beguiling mystique.
Coloured mascaras add that certain “je ne sais quoi”. Not quite up to that “I don’t know what” factor? How about wearing your regular mascara and simply place a wee twinkle of coloured mascara on the tips of your curled lashes. Nice. Then, you can save wearing coloured mascaras neat for days when you’re feeling ready to make your move. In the meantime, enjoy this gorgeous point of difference, that could, quite possibly, make your day.
